Showing posts with label Body Paintings. Show all posts

Thursday, December 2, 2010

Celebrity Gisele Bundchen goes nude for body painting. Stunning body, stunning painting.

Models show off highly inventive and creative interpretations of the classic Chinese dress Qi Pao and iconic cultural motifs to launch Australian Fashion Week.

Kobe Hardman. Photo: AFP
First photo in this blog collection for gold dust. Watch out for more photos in the near future. I'm make a new Gold Dust series.

Monday, November 29, 2010

Body painting on nude woman with United Kingdom as the motif.
Body painting of Germany soccer jersey on a semi-nude woman soccer fan during FIFA WC 2006.
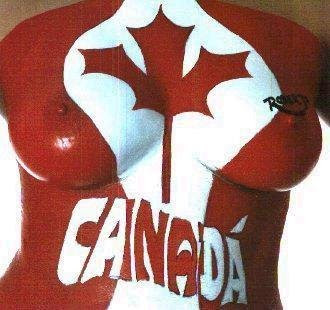
Body Painting - Canada Flag on breasts
Body painting of a Canada flag on a women bared breasts.

Friday, November 19, 2010

Brooklyn Decker was photographed by Randall Grant in Grenada. All bodypainting and make-up by Joanne Gair for LBB Artist Management, using Body Art Products by Reel Creations, INC and Tinsley Make Up FX Studio. Photos from sportsillustrated.cnn.com


Brooklyn Decker, 21, was born in Middletown, Ohio, and raised in Charlotte, N.C. She was discovered at age 16 in a mall and began her career as the face of Mauri Simone. She has been featured in Teen Vogue, Cosmopolitan, FHM and Glamour as well as campaigns for Gap, Intimissimi and Victoria's Secret and in music videos for Jimmy Buffett and 3 Doors Down. This is Brooklyn's fourth Swimsuit Issue.

Heidi Klum in a body paint swimsuitGorgeous Heidi Klum in an artistic body paint swimsuit.


Jessica White Body Paint

Jessica White goes nude for a body paint photo shot with Sports Illustrated Swimsuit.

Jessica White Body Paint

Irina Shayk Body Paint

Irina Shayk goes nude for a body paint session photo for the Sports Illustrated Swimsuit.

irina_shayk_body_paint

Jessica Gomes wearing body paint bra.

Jessica Gomes Body Paint
Watch this special video and see how Jessica Gomes got her body painted for SI Swimsuit 2008.


Tuesday, November 9, 2010

Halloween is such fun for kids of all ages, and adults too. Here are some face painting ideas to get you in the Halloween spirit.
Halloween face painting idea 1: pumpkin
A bright orange pumpkin painted on each cheek. Black paint used to paint eyes, nose and mouth. A light grey would be used to show the ridges of the pumpkin as well as its outline.
An alternative would be to do a full face pumpkin with an orange face base (blending a darker orange shade over cheekbones), black triangle shape over the eyes (extending above and below the eye area), a black nose and a large black mouth (need to cover more than just the lips).
Halloween face painting idea 2: skull
A full face design. Has a white face as the base, large black 'panda' eyes, black and white vertical stripes on the lips (with the white stripes wider than the black ones) and a trickle of red from one side of the mouth (to indicate blood).
Halloween face painting idea 3: vampire
A full face design. A white face base, bright red lips, fangs coming out of each corner of the lower lip (outline is light grey, fill is white, and tip is red to denote some blood), eye lids are smoky grey (right up to and over eye brows), eye brow then exaggerated with black sweeping strokes.
Halloween face painting idea 4: bat
A full face design. A white face base, bat's face painted on forehead above the nose (it's in black with light grey for eyeballs, and for some definition in ears); the bat's body is painted in black on the nose and ends at the base of the nostrils (use different shadings of black; the bat's wings extends out from head and body and covers the eyes curving up towards the temple and down the outside of the eye to mid cheek (again use different black shadings and some fine dark grey strokes to paint some definition into the wings); the lips are painted in dark grey with an exaggerated upward curl at the corners.


Body Painting: Henna Tattoo

Henna tattoos are an ancient custom in India: girls and women are body painted before ceremonies, like marriage. They painted complicated patterns on their hands and feet to symbolize their fertility.
Henna (or 'Mehndi', the Indian name) is made from the henna plant (Lawsonia Inermis). The leaves of the plant are dried and ground. The powder gets mixed with water and you get a sort of green-brownish mud. If you put that mud on your skin, let it harden, and then peel it off, you will notice it has left an orange color.
You can get your henna at an eastern shop or a 'souk' in many different colors. There's orange, mahogany, brown and black. The orange one is the traditional henna. The black henna is synthetic. It contains PDD (P-phenylenediamene) and can cause allergic reactions. Even if it doesn't cause irritations, it's still unhealthy. Moreover, in the past, black henna at your wedding was considered a disgrace.
Henna Recipe

With one pack of henna, you'll have enough to body paint the entire football team. Put the henna in a bowl and gently pour some lemon juice and boiling water in the bowl. Don't use too much water, the mud has to resemble the thickness of sate sauce. The purpose of the lemon juice is to help the color hold better on your skin.
Your skin should be clean, dry and not fat. If you want to color your nails too, they shouldn't have nail polish on them. Make sure you really want this, because your nails will be orange for about 2 months. It doesn't come off! When the henna is cold, you can get to painting.
If you want to paint your foot soles, which is a traditional custom in Marokko, make sure you have a pillow of some kind to keep your feet off the floor, before you know it, the henna mud is everywhere! You can apply the henna with all sorts of instruments, what works best is a syringe (without the needle of course).
Symmetric and geometric shapes work best. Don't make the lines too thin, the color won't come on to your skin very well. The bigger the surface, the brighter the color will be.
Now: the annoying part: Waiting...
Let the henna dry in the sun, the warmth of the sun will get your color deeper into your skin. You can also use a hairdryer.
If you make a mistake in the picture your painting: ACT QUICKLY! If you wipe it off too late, the henna will leave a red spot.
After a while, the henna will start to burst. Don't peel it off yet! The henna has to stay on for at least two hours. Then you can start removing the crusts of mud.
DON'T remove the henna with water! Just scrape the crusts of your skin, you can do this with a bold knife. Don't let your body painting get in touch with water for the first couple of hours. Right after you scraped off all the crusts, rub your skin in with olive oil. It will make the color brighter and help keep the color on as long as possible. Your henna painting will survive for about a month or so.
Also nice to know: Swimming, body peeling, scrubbing your back, and bodyscrub products will make the henna tattoo deteriorate faster.


Body Paint and Bibles

I love traveling, not the fact of going somewhere else, but the action of traveling from one place to another. My fascination is of being anonymous, and of course the time spent “people watching”. This is often done alone, which I think is more entertaining as you are not distracted from the serious business of observing.
Two journeys this year, one to the UK and one day trip to Barcelona.

The UK bound trip started with the normal commotion I always achieve at airports. This is caused by the habit of wearing as much as I can to avoid carrying it or more to the point paying the dreaded extortionate fees “excess baggage” what an awful term...nothing I carry is excess to my needs! So off go the alarms, I could offer my services to test their equipment because no matter what I remove I always set the systems blaring. After the “pat down” with nothing found to attribute to the noise I always hear myself apologise! With the current state of the world I am not complaining about these security measures I just would like to get through, just once, without this hullabaloo!
Then homeward bound, the UK airport tempted me with Marks and Spencer food outlet just before you go through customs control. Great idea, buy lunch, and a few presents to bring back, a thought of what you are allowed to have in hand luggage I avoided drinks but settle on a sandwich, fruit, biscuits etc plus cheeses and chutneys for friends. So I discover this is a ploy by airport staff to get free lunches, they confiscated the lot. Nowhere could I see on the list of banned items M&S lunch! I wanted to say “stop let me back over the barrier and I will eat it first” but the fear of not being let through to travel was greater than hunger.
The day trip to Barcelona was just as eventful for different reasons. An unscheduled change of trains half way meant a different set of traveling companions. Sitting ourselves by the door, with an empty seat in front and two to the side, the carriage was almost full. Then, three young, smartly dressed men boarded, taking up the only empty seats. The first oddness I noticed they all wore the same jackets and had name badges so without further thought I assumed they were security or police. Then I saw the bibles they all started to read as we started out of the station. With an hours non stop journey to Barcelona in a full carriage, we start to realize that our traveling companions had a mission or should I say, they were missionaries. Within minutes they struck up conversation with us.
Caught off guard, but fascinated to understand why these three young American men were in Spain. To counter their obvious objective to discuss The Lord, we asked them many questions on their background, my friend and I taking it in turn to question them. The first thought that ran through my head was the “good cop bad cop” ploy we naturally adopted. The friend was gentle in the questioning I was not so! Why was I allowing myself to be drawn into this exchange? Not wanting my religious believes to be questioned or was I feeling confronted?
With the journey over, ahead of us the serious task of shopping. We starting walking from the station in the crowds of city folks going about their business. I could not believe what I saw next, as nobody else seemed to notice, I began to wonder if my eyes deceived me. “Did you see that”? “Was he wearing anything”? Not a pretty sight, just a man with clothes painted on his naked body. To add to the amusing spectacle...not a head was turned. Just like the earlier time in the train carriage I felt the day was going to be different, and it certainly was!
Maybe that is the reason I love traveling, you cannot control what you may encounter only how you react to it.

Face Paint Recipes

These easy face paint recipes show how to make homemade face paint using common household ingredients. Mix and store in baby food jars or discarded film canisters. Be ready for your next kids party or dress-up event.HOMEMADE FACE PAINT RECIPES
Facepaint Recipe #1
1 tsp. Cornstarch

½ tsp. Cold cream

½ tsp. Water

Food coloring (variety of colors)
Mix together cornstarch and cold cream until well blended. Add water and stir. Add food coloring one drop at a time until you get the desired color.
Facepaint Recipe #2
3 tblsps. Cornstarch

1 tblsp. Flour

3/4 cup Karo light corn syrup

1/4 cup water

½ tsp. Liquid food coloring
Mix cornstarch and flour together in a bowl. Gradually stir in Karo syrup and water until smooth. Divide mixture into individual containers as needed and tint each one with the food coloring of your choice. Leave one batch untinted.
***************************************
Clown Make-up
Blend on a paper plate:

2 tblsp. shortening

5 tsps. cornstarch

1 tsp. flour

Dab of Vaseline
Add food coloring for various colors.
***************************************
Fake Blood for Halloween Party Make-up
Karo brand corn syrup

Red and blue food coloring

Milk
Add some red food coloring to the corn syrup, then just a drop or two of blue to get a more realistic dark color. Milk will make the blood appear more opaque and more realistic.
Note: This mixture is sticky and can stain clothes.
****************************************
More Fun Make-up Tips:
To lightly blacken faces, carefully burn a cork and when cool, rub on the face.
For a ghoulish look, add a dusting of flour to already made up faces.
For a stubbly bearded look, sprinkle tobacco over a thin layer of vaseline.

Friday, November 5, 2010

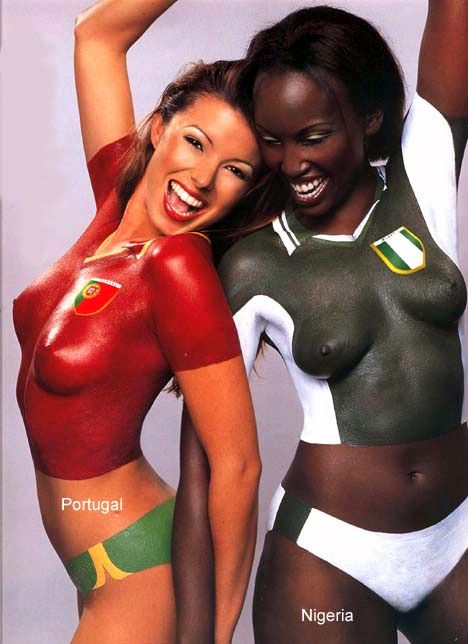
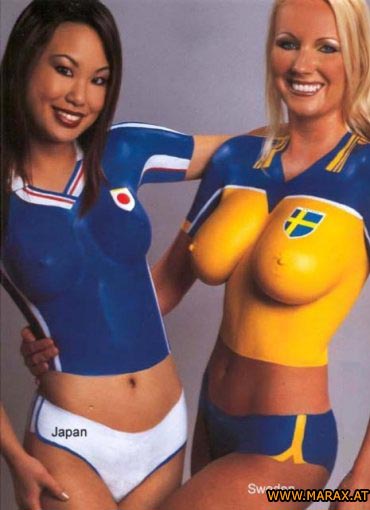
Body Painting Two Girl of Country

Body  Painting Two Girl of Country

Body  Painting Two Girl of Country
Body Painting Two Girl of Country

Body Painting Two Women of Country

Body Painting Two Women of Country


All Sexy Body Painting

All Sexy Body Painting
All Sexy Body  Painting
All Sexy Body Painting


All Sexy Body Painting

All Sexy Body Painting
All Sexy Body  Painting
All Sexy Body Painting


New Body Painting Sexy


New Body Painting Sexy


FREE HOT BODYPAINTING | HOT GIRL GALERRY